
|
||
|
||
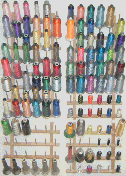 |
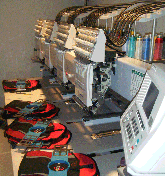
For an embroidery job, a customer can either bring in their logo or design, or we can create one for you. We take the design and create a file by making stitches with a digitizing software package. After that, we put the file onto either our single-head or four-head embroidery machine. We put your product into embroidery hoops and place it onto the machine. Next, we put the thread colors, based on design, onto the machine if they are not already loaded. Finally, the embroidery starts and the customer receives their product. |
 |
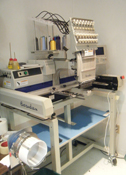 |
The single-head machine (left) is used for small orders, and the four-head machine (right) is used for larger jobs because it is more efficient. |
 |
 Click here to see more of the screenprinting process. |
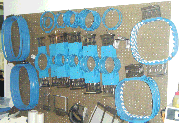
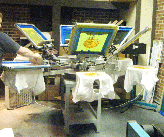
For a screenprinting job, a customer can either bring in their design, or we can create one for you. We generate the design onto the computer using either CorelDraw or Adobe Photoshop. For multiple color designs, we have to create color separations in the program in order to create different screens. Once the designing is complete, we print out the color separations onto film positives. We use those printouts to burn the image onto screens. We burn screens with a machine that uses a light source with a glass plate and a vacuum table. We place a screen over the film positive in the machine to create a stencil on the screen. Next, we wash the screens to expose the stencil and let it dry for about an hour. We then load the screens onto the press and align them up to match the screens together, so a uniform design will be produced. Finally, we choose the ink color and put ink on all the screens. After all the preparation work is done, it is time to print the products. We place one product onto the screen palette. We squeegee the ink through the stenciled screen onto the products. After all the colors are applied to the products, we pull the products off of the palettes and into the dryer in order to cure the ink. Now the screenprinting is complete. |
|
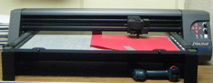 |
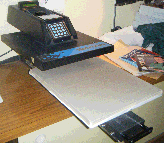
A majority of heat press jobs are putting names on tops and bottoms. For this, we must type names on the computer, save the file, and send it to the cutter. We place the film onto the cutter and begin the cutting process. After the cutter is finished, we peel the film off and peel the excess film away from the name. Once that is all complete, we place the product onto the press and warm the product up for a few seconds. Finally, we place the lettering onto the product, heat press it on, and remove the product. |
 |
|
||